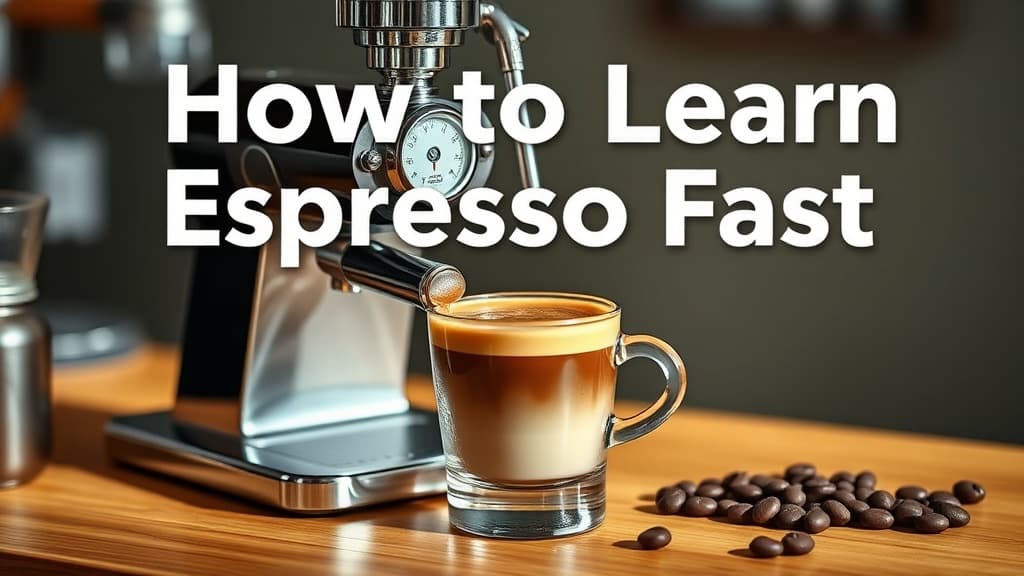
How to Learn Espresso Fast: A 30-Day Beginner's Guide
Quick Summary
Can a complete beginner learn to make world-class espresso in 30 days? Here's what actually works — from dialling in shots to latte art and beyond.
In This Article
What Happens When a Complete Beginner Tries to Master Espresso
Most people assume that making great espresso is either an innate gift or the product of years behind a commercial machine. The truth is more interesting — and more accessible — than that. When filmmaker and creator Matt D'Avella challenged himself to go from zero espresso experience to competing against a two-time Australian barista champion in just 30 days, what he discovered wasn't just how to make better coffee. He uncovered a surprisingly structured, learnable path that any motivated beginner can follow.

This isn't a story about natural talent. It's a story about deliberate practice, the right variables, and what it actually takes to go from a bitter, watery first shot to something you'd be proud to serve. Whether you've just bought your first espresso machine or you've been pulling mediocre shots for years without knowing why, here's what the science and the craft of espresso actually demand from you.
Why Espresso Is Harder Than It Looks — And Easier Than You Think
Espresso has a reputation for being finicky, and that reputation is earned. Unlike a French press or a pour-over, where errors tend to average out, espresso amplifies every mistake. Too coarse a grind and your shot runs in 15 seconds, producing a thin, sour cup. Too fine, and the water can't push through at all — sometimes for 90 seconds or more, with barely a drop to show for it.
But here's the liberating reframe that World Barista Champion James Hoffmann offers: the actual process is simple. There are really only a handful of variables that matter most, and once you understand them, you can make meaningful improvements fast. The complexity isn't in the number of steps — it's in learning to read what your cup is telling you.
Think of it like cooking a steak. The technique is simple in principle: apply heat to meat. But knowing when it's done, reading the colour and the feel, adjusting for thickness and temperature — that's where skill lives. Espresso is no different.
The Three Variables That Actually Matter
If you want to learn espresso quickly, ignore the noise and focus on the fundamentals. According to Hoffmann, three variables control roughly 90% of your outcome:
Dose — the amount of ground coffee you put in the portafilter. A standard starting point for a double shot is 18 grams. Small changes here have a compounding effect on everything else.
Yield — the weight of liquid espresso in your cup. This is where beginners go wrong most often: they measure by volume or eyeball it. Don't. Use a scale. A classic 1:2 ratio means 18g of coffee should produce 36g of espresso. This ratio gives you a benchmark to taste against and adjust from.
Brew time — how long the water takes to pass through the coffee. You're aiming for 25 to 30 seconds. This is controlled almost entirely by your grind setting. Grind finer to slow the shot down; coarser to speed it up.
These three levers interact constantly. Change one, and you'll likely need to revisit the others. But the beautiful thing is that once you're tracking all three, you're no longer guessing — you're problem-solving.
The Skill Nobody Talks About: Learning to Taste
You can memorise every recipe and own the best equipment on the market, but if you can't identify what's wrong with a shot by tasting it, you're flying blind. Developing your palate is, arguably, the most important skill in the entire espresso learning process — and also the most overlooked by beginners.
The two flavour defects you'll encounter most often are sourness and bitterness. A sour or sharp shot usually means under-extraction: the water hasn't pulled enough soluble compounds from the grounds. Grind finer, slow the shot down, let the water do more work. A bitter, harsh, or drying shot points to over-extraction: the water has pulled too much, including the compounds you don't want. Grind coarser, speed the shot up.
But it's rarely that clean-cut. Real espresso sits on a spectrum, and learning to distinguish pleasant acidity from unpleasant sourness — or rich body from flat bitterness — takes intentional tasting, not just drinking. The fastest way to accelerate this? Taste alongside someone more experienced. A single session with a knowledgeable barista, cupping coffees side by side, will do more for your palate than weeks of solo practice. It gives you language for what you're experiencing and a reference point you can return to.
Latte Art: The Variable You Can't Fake
If dialling in espresso is a logic puzzle, latte art is pure motor skill. And motor skills take repetition — there's no shortcut.
The technique breaks down into three stages: steaming the milk to create smooth, glossy microfoam; pouring high initially to fill the base of the cup and integrate the espresso; then lowering the pitcher and tilting the cup to let the foam sit on the surface and form a pattern. Simple to describe. Genuinely difficult to execute consistently.
The most common beginner mistakes are steaming the milk too long (producing large, airy bubbles instead of smooth microfoam), pouring too slowly (the foam sinks instead of floating), or starting the surface design too early before enough volume is in the cup.
The honest advice: expect your first twenty attempts to look abstract at best. That's fine. What you're building is muscle memory and an intuitive feel for how milk moves. Progress is measurable — you'll see it improving shot by shot — but it won't come from watching videos alone. You need to pour, fail, assess, and pour again.
Gear, Budget, and the 1% Trap
The espresso equipment market is an elaborate ecosystem designed to separate enthusiasts from their money. Precision baskets, calibrated tampers, distribution tools, puck screens, bottomless portafilters — each promises that final 1% improvement. Some of them genuinely deliver. Most of them are irrelevant until your fundamentals are solid.
For beginners, a few tools genuinely matter:
- A reliable scale — non-negotiable. Weighing your dose and yield is the single highest-return habit you can build.
- A decent grinder — arguably more important than the machine itself. Inconsistent grind size produces inconsistent extraction. Budget for quality here before anywhere else.
- A needle distributor — breaking up clumps in the coffee puck before tamping promotes even extraction and reduces channelling, where water finds the path of least resistance and bypasses some grounds entirely.
- A knockbox — small, cheap, and saves your countertop.
Set a budget before you start browsing, and hold to it. The upgrade spiral is real, and it accelerates. More importantly, no piece of equipment will compensate for not understanding the fundamentals. The best investment you can make in your first month isn't gear — it's one or two in-person sessions with an experienced barista.
How Long Does It Actually Take to Get Good?
The honest answer: it depends entirely on how intentional you are. Volume alone isn't the metric. Making five shots a day mindlessly will improve your muscle memory but won't accelerate your understanding. Making one or two shots a day with full attention — adjusting one variable, tasting critically, noting what changed — will compound rapidly.
World Barista Championship runner-up Jack Simpson puts it well: getting to 95% quality isn't that hard. The ceiling is accessible. It's the final 5% — the level that separates national champions from excellent everyday baristas — that takes years, sometimes decades. But that 95% level? You can reach something approaching it in a month of focused practice. Not perfect, not competition-grade, but genuinely impressive and deeply enjoyable.
For most people, that's more than enough. The goal isn't to win a championship. The goal is to make coffee that makes your morning better, that you're proud to serve to friends, and that gives you a real sense of craft and process. That goal is completely achievable — and it starts with your next shot.
Practical Takeaways: Your 30-Day Espresso Plan
Free Weekly Newsletter
Enjoying this guide?
Get the best articles like this one delivered to your inbox every week. No spam.
If you're starting from zero, here's a simple framework to structure your first month:
Week 1 — Learn the recipe. Focus exclusively on dose, yield, and brew time. Use a 1:2 ratio. Weigh everything. Don't touch your grind setting until you've pulled five consistent shots.
Week 2 — Learn to taste. Start adjusting your grind by one notch at a time and taste each result critically. Can you identify the difference? Is it more or less acidic? Fuller or thinner in body? Book one session with a local barista if you can.
Week 3 — Introduce milk. Start steaming. Aim for smooth microfoam before you attempt any art. Practice the pour: high first, then low. Don't worry about the pattern yet.
Week 4 — Dial in a new coffee. Buy a different bean — ideally a single origin — and dial it in from scratch. This is where everything consolidates. You'll find you can adjust faster and taste more clearly than in week one.
One shot a day, done with full attention, is enough. Be patient with yourself on latte art. And remember: even a technically imperfect shot made with real understanding beats a flawless-looking cup pulled on autopilot.
Frequently Asked Questions
How long does it realistically take to make good espresso as a beginner?
Most people can make a genuinely enjoyable espresso within one to two weeks of daily, intentional practice. Getting consistently excellent results — understanding how to adjust for different beans and troubleshoot problems — typically takes a full month of focused effort. Competition-level precision takes considerably longer, but that's not the goal for most home baristas.
What's more important for espresso: the machine or the grinder?
The grinder. A mediocre machine with a great grinder will consistently outperform a great machine with a mediocre grinder. Grind consistency is fundamental to even extraction, which is fundamental to flavour. If you're working with a budget, spend more of it on the grinder.
What does 'dialling in' espresso actually mean?
Dialling in refers to the process of adjusting your grind setting — and sometimes your dose or yield — to achieve a shot that tastes balanced and hits your target brew time. Because coffee changes with roast date, humidity, and bean variety, you often need to re-dial when you open a new bag or when conditions shift. It's an ongoing calibration process, not a one-time setup.
Do I need a scale to make good espresso?
Yes — at least while you're learning. Measuring by eye or using volumetric markers on your machine introduces too much variability to understand what's actually changing between shots. Once you've internalised your recipe and built consistent habits, you may be able to rely on feel more. But in the beginning, a scale is the most valuable tool on your bench.
What's the best way to improve your coffee palate quickly?
Taste intentionally and comparatively. Rather than simply drinking your espresso, pause and ask specific questions: Is it sour or bitter? Bright or flat? Does the flavour linger or disappear quickly? Even better, taste alongside an experienced barista who can help you name what you're experiencing. A single cupping session — where multiple coffees are tasted side by side — can do more for your palate development than weeks of solo practice.
Frequently Asked Questions
What Happens When a Complete Beginner Tries to Master Espresso
Most people assume that making great espresso is either an innate gift or the product of years behind a commercial machine. The truth is more interesting — and more accessible — than that. When filmmaker and creator Matt D'Avella challenged himself to go from zero espresso experience to competing against a two-time Australian barista champion in just 30 days, what he discovered wasn't just how to make better coffee. He uncovered a surprisingly structured, learnable path that any motivated beginner can follow.
This isn't a story about natural talent. It's a story about deliberate practice, the right variables, and what it actually takes to go from a bitter, watery first shot to something you'd be proud to serve. Whether you've just bought your first espresso machine or you've been pulling mediocre shots for years without knowing why, here's what the science and the craft of espresso actually demand from you.
Why Espresso Is Harder Than It Looks — And Easier Than You Think
Espresso has a reputation for being finicky, and that reputation is earned. Unlike a French press or a pour-over, where errors tend to average out, espresso amplifies every mistake. Too coarse a grind and your shot runs in 15 seconds, producing a thin, sour cup. Too fine, and the water can't push through at all — sometimes for 90 seconds or more, with barely a drop to show for it.
But here's the liberating reframe that World Barista Champion James Hoffmann offers: the actual process is simple. There are really only a handful of variables that matter most, and once you understand them, you can make meaningful improvements fast. The complexity isn't in the number of steps — it's in learning to read what your cup is telling you.
Think of it like cooking a steak. The technique is simple in principle: apply heat to meat. But knowing when it's done, reading the colour and the feel, adjusting for thickness and temperature — that's where skill lives. Espresso is no different.
The Three Variables That Actually Matter
If you want to learn espresso quickly, ignore the noise and focus on the fundamentals. According to Hoffmann, three variables control roughly 90% of your outcome:
Dose — the amount of ground coffee you put in the portafilter. A standard starting point for a double shot is 18 grams. Small changes here have a compounding effect on everything else.
Yield — the weight of liquid espresso in your cup. This is where beginners go wrong most often: they measure by volume or eyeball it. Don't. Use a scale. A classic 1:2 ratio means 18g of coffee should produce 36g of espresso. This ratio gives you a benchmark to taste against and adjust from.
Brew time — how long the water takes to pass through the coffee. You're aiming for 25 to 30 seconds. This is controlled almost entirely by your grind setting. Grind finer to slow the shot down; coarser to speed it up.
These three levers interact constantly. Change one, and you'll likely need to revisit the others. But the beautiful thing is that once you're tracking all three, you're no longer guessing — you're problem-solving.
The Skill Nobody Talks About: Learning to Taste
You can memorise every recipe and own the best equipment on the market, but if you can't identify what's wrong with a shot by tasting it, you're flying blind. Developing your palate is, arguably, the most important skill in the entire espresso learning process — and also the most overlooked by beginners.
The two flavour defects you'll encounter most often are sourness and bitterness. A sour or sharp shot usually means under-extraction: the water hasn't pulled enough soluble compounds from the grounds. Grind finer, slow the shot down, let the water do more work. A bitter, harsh, or drying shot points to over-extraction: the water has pulled too much, including the compounds you don't want. Grind coarser, speed the shot up.
But it's rarely that clean-cut. Real espresso sits on a spectrum, and learning to distinguish pleasant acidity from unpleasant sourness — or rich body from flat bitterness — takes intentional tasting, not just drinking. The fastest way to accelerate this? Taste alongside someone more experienced. A single session with a knowledgeable barista, cupping coffees side by side, will do more for your palate than weeks of solo practice. It gives you language for what you're experiencing and a reference point you can return to.
Latte Art: The Variable You Can't Fake
If dialling in espresso is a logic puzzle, latte art is pure motor skill. And motor skills take repetition — there's no shortcut.
The technique breaks down into three stages: steaming the milk to create smooth, glossy microfoam; pouring high initially to fill the base of the cup and integrate the espresso; then lowering the pitcher and tilting the cup to let the foam sit on the surface and form a pattern. Simple to describe. Genuinely difficult to execute consistently.
The most common beginner mistakes are steaming the milk too long (producing large, airy bubbles instead of smooth microfoam), pouring too slowly (the foam sinks instead of floating), or starting the surface design too early before enough volume is in the cup.
The honest advice: expect your first twenty attempts to look abstract at best. That's fine. What you're building is muscle memory and an intuitive feel for how milk moves. Progress is measurable — you'll see it improving shot by shot — but it won't come from watching videos alone. You need to pour, fail, assess, and pour again.
Gear, Budget, and the 1% Trap
The espresso equipment market is an elaborate ecosystem designed to separate enthusiasts from their money. Precision baskets, calibrated tampers, distribution tools, puck screens, bottomless portafilters — each promises that final 1% improvement. Some of them genuinely deliver. Most of them are irrelevant until your fundamentals are solid.
For beginners, a few tools genuinely matter:
- A reliable scale — non-negotiable. Weighing your dose and yield is the single highest-return habit you can build.
- A decent grinder — arguably more important than the machine itself. Inconsistent grind size produces inconsistent extraction. Budget for quality here before anywhere else.
- A needle distributor — breaking up clumps in the coffee puck before tamping promotes even extraction and reduces channelling, where water finds the path of least resistance and bypasses some grounds entirely.
- A knockbox — small, cheap, and saves your countertop.
Set a budget before you start browsing, and hold to it. The upgrade spiral is real, and it accelerates. More importantly, no piece of equipment will compensate for not understanding the fundamentals. The best investment you can make in your first month isn't gear — it's one or two in-person sessions with an experienced barista.
How Long Does It Actually Take to Get Good?
The honest answer: it depends entirely on how intentional you are. Volume alone isn't the metric. Making five shots a day mindlessly will improve your muscle memory but won't accelerate your understanding. Making one or two shots a day with full attention — adjusting one variable, tasting critically, noting what changed — will compound rapidly.
World Barista Championship runner-up Jack Simpson puts it well: getting to 95% quality isn't that hard. The ceiling is accessible. It's the final 5% — the level that separates national champions from excellent everyday baristas — that takes years, sometimes decades. But that 95% level? You can reach something approaching it in a month of focused practice. Not perfect, not competition-grade, but genuinely impressive and deeply enjoyable.
For most people, that's more than enough. The goal isn't to win a championship. The goal is to make coffee that makes your morning better, that you're proud to serve to friends, and that gives you a real sense of craft and process. That goal is completely achievable — and it starts with your next shot.
Practical Takeaways: Your 30-Day Espresso Plan
If you're starting from zero, here's a simple framework to structure your first month:
Week 1 — Learn the recipe. Focus exclusively on dose, yield, and brew time. Use a 1:2 ratio. Weigh everything. Don't touch your grind setting until you've pulled five consistent shots.
Week 2 — Learn to taste. Start adjusting your grind by one notch at a time and taste each result critically. Can you identify the difference? Is it more or less acidic? Fuller or thinner in body? Book one session with a local barista if you can.
Week 3 — Introduce milk. Start steaming. Aim for smooth microfoam before you attempt any art. Practice the pour: high first, then low. Don't worry about the pattern yet.
Week 4 — Dial in a new coffee. Buy a different bean — ideally a single origin — and dial it in from scratch. This is where everything consolidates. You'll find you can adjust faster and taste more clearly than in week one.
One shot a day, done with full attention, is enough. Be patient with yourself on latte art. And remember: even a technically imperfect shot made with real understanding beats a flawless-looking cup pulled on autopilot.
Frequently Asked Questions
How long does it realistically take to make good espresso as a beginner?
Most people can make a genuinely enjoyable espresso within one to two weeks of daily, intentional practice. Getting consistently excellent results — understanding how to adjust for different beans and troubleshoot problems — typically takes a full month of focused effort. Competition-level precision takes considerably longer, but that's not the goal for most home baristas.
What's more important for espresso: the machine or the grinder?
The grinder. A mediocre machine with a great grinder will consistently outperform a great machine with a mediocre grinder. Grind consistency is fundamental to even extraction, which is fundamental to flavour. If you're working with a budget, spend more of it on the grinder.
What does 'dialling in' espresso actually mean?
Dialling in refers to the process of adjusting your grind setting — and sometimes your dose or yield — to achieve a shot that tastes balanced and hits your target brew time. Because coffee changes with roast date, humidity, and bean variety, you often need to re-dial when you open a new bag or when conditions shift. It's an ongoing calibration process, not a one-time setup.
Do I need a scale to make good espresso?
Yes — at least while you're learning. Measuring by eye or using volumetric markers on your machine introduces too much variability to understand what's actually changing between shots. Once you've internalised your recipe and built consistent habits, you may be able to rely on feel more. But in the beginning, a scale is the most valuable tool on your bench.
What's the best way to improve your coffee palate quickly?
Taste intentionally and comparatively. Rather than simply drinking your espresso, pause and ask specific questions: Is it sour or bitter? Bright or flat? Does the flavour linger or disappear quickly? Even better, taste alongside an experienced barista who can help you name what you're experiencing. A single cupping session — where multiple coffees are tasted side by side — can do more for your palate development than weeks of solo practice.
About Zeebrain Editorial
Our editorial team is dedicated to providing clear, well-researched, and high-utility content for the modern digital landscape. We focus on accuracy, practicality, and insights that matter.
More from Lifestyle & Hacks


Related Guides
Keep exploring this topic
Explore More Categories
Keep browsing by topic and build depth around the subjects you care about most.