Build a 3D Printed Bop It Game with Circuit Python
Quick Summary
Learn how to build a DIY 3D printed handheld game inspired by Bop It using Adafruit's Feather RP2040 Prop-Maker and Circuit Python. Full guide inside.
In This Article
Build a 3D Printed Bop It Game with Circuit Python and the Feather RP2040
There's something almost magical about holding a device you designed yourself — one that lights up, plays sound, and responds to every twist, shake, and press of your hand. That's exactly the feeling I get every time I bring a new 3D printed electronics project to life, and this one might be the most playful yet. Inspired by the iconic '90s toy Bop It, this handheld game combines 3D printed enclosure design, the Adafruit Feather RP2040 Prop-Maker, and Circuit Python into a portable, interactive experience that's as fun to build as it is to play.

If you've ever wanted to merge your love of making with a genuine sense of nostalgia, buckle up — because this project is exactly that.
Why the Feather RP2040 Prop-Maker Is the Perfect Brain for This Build
When you're designing a 3D printed handheld game, the microcontroller you choose shapes everything — how many components you can connect, how the audio sounds, how portable the final device is. The Adafruit Feather RP2040 Prop-Maker earns its place at the heart of this project for several very practical reasons.
First, it has a built-in I2S amplifier. That means you get genuinely good audio quality without bolting on a separate audio board. For a game that relies on sound cues — think reactive button blips, a driving beat that speeds up as levels advance, and satisfying spinning ratchet sounds — audio quality isn't a luxury, it's essential.
Second, the Prop-Maker has a built-in accelerometer. In a game where "shake it" is one of the core commands, having the accelerometer baked right into the board eliminates an entire breakout module. Less wiring, less space consumed, fewer potential failure points.
Third, it handles battery charging on-board. Pair it with a beefy 2200mAh cylindrical lithium battery and you have a genuinely portable handheld that won't die halfway through a frantic game session. The whole setup connects over USB for easy code updates, which is one of those small-but-crucial quality-of-life features when you're actively iterating on firmware.
The generous GPIO pin count also means you can drive NeoPixels, read analog sliders, handle toggle switches, and communicate with I2C peripherals — all simultaneously, without resorting to a GPIO expander.
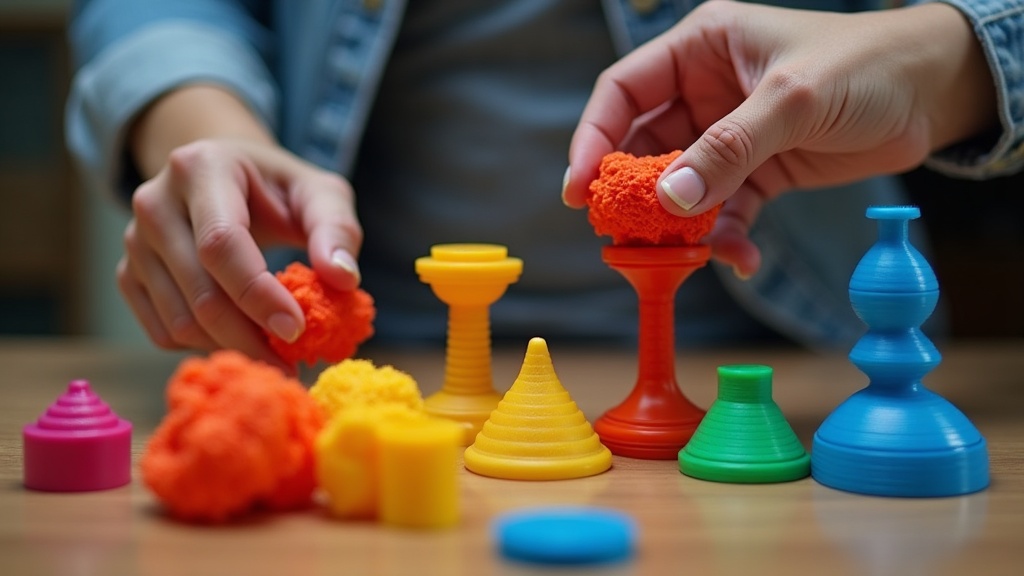
Designing a 3D Printed Enclosure That Feels Like a Real Product
One of the most underrated skills in DIY electronics is enclosure design, and this project takes it seriously. The handheld body was designed in CAD with careful attention to how it actually feels in your hands before a single part was printed.
The enclosure is a two-piece shell joined by countersunk screws — a deliberate choice over snap-fit closures. If you're building something that might get dropped (and a fast-paced reaction game absolutely will), countersunk screws give you a much more durable connection. They also give the finished device that satisfying, product-like quality you get when you pick up any well-made toy.
Inside, every component has its place. The alphanumeric LED display sits in its own sub-enclosure with PCB clip tabs — the same snap-fit mounting method used in Adafruit's Cutie Pie builds — because there simply isn't clearance for traditional screw heads at that location. The NeoPixel stick has built-in standoffs that align with its mounting holes. The battery clips into a snug compartment. Nothing rattles. Nothing shifts.
The multi-color printing capability of a modern multi-material FDM printer — like the Bambu AMS system — opens up a whole new dimension here. The faceplate comes out of the printer already sporting that punchy '80s-meets-'90s hot pink and light blue color scheme in a single print job. The NeoPixel diffuser window is printed right into the faceplate as a translucent panel. No post-processing, no separate parts, no glue. It's one of those moments where the technology genuinely earns its keep.
The Controls: Every Input Tells a Story
What makes this 3D printed game so interesting isn't just the electronics — it's the deliberate variety of physical inputs, each one demanding a different physical action from the player.
Press it — A Cherry MX clicky switch mounted to the faceplate. There's a reason mechanical keyboard enthusiasts are obsessed with these: the tactile and auditory feedback is deeply satisfying. In a reaction game, that physical confirmation matters.
Slide it — A potentiometer fader gives you a smooth analog input. Mapping it to a game command adds a tactile dimension you just can't replicate with another button.
Toggle it — A flip toggle switch. Fast, binary, decisive. Exactly the kind of input that works brilliantly under time pressure.
Shake it — Handled entirely by the Prop-Maker's onboard accelerometer. No extra hardware needed.
Spin it — This is the most inventive input of the bunch. Rather than a standard rotary encoder, a small ball bearing with an embedded neodymium magnet rolls around a circular track. A Hall effect sensor — a tiny three-pin component that detects magnetic fields — is mounted inside the enclosure. Every time the magnet passes the sensor, it registers a spin. The result is an interaction that feels smooth, tactile, and genuinely different from anything a rotary encoder would deliver.
That Hall effect sensor solution is worth pausing on. It requires just a pull-up resistor and three connections: power, ground, and signal to an analog pin. It's elegant precisely because it's so simple — and it produces an input that would be difficult or expensive to achieve any other way at this scale.
Wiring Strategy: Taming Multiple Ground Connections
Here's something every maker eventually confronts: when you have five or six components all needing a ground connection, your wiring can spiral into a messy rat's nest very quickly. Planning your ground strategy in advance isn't just tidy — it's what separates a prototype that works reliably from one that throws mysterious errors.
For this build, the approach is to daisy-chain grounds wherever possible. The Feather's screw block terminal accepts up to three wires, giving you a convenient hub. The NeoPixel stick has a spare ground pad on its back solder pads. The slide switch, potentiometer, and toggle switch can share a common ground line that feeds into one of those terminals. The servo ground pins are also available as overflow options.
This kind of deliberate planning pays dividends later. When you're debugging at midnight and one input isn't responding, knowing your ground topology means you can trace the issue in minutes instead of hours.
The STEMMA QT connectors on the alphanumeric display are a welcome relief in the middle of all this manual wiring. Plug in, done. The I2C connection just works, the Circuit Python library handles the rest, and you're back to focusing on the interesting stuff.
Circuit Python Audio: Layering Sound Like a Mini Mixing Board
Sound design is where this project really elevates itself above a typical maker build. Using Circuit Python's AudioIO mixer functionality, you can run multiple audio tracks simultaneously at individually controlled volume levels. Think of it as a tiny software mixing board running on your microcontroller.
In practice, that means the game can have a driving rhythmic beat playing on a continuous loop — one that gradually increases in tempo as the player advances through levels — while simultaneously triggering discrete sound effects for each input. Spin the ball bearing and a ratcheting click fires. Hit the toggle switch and a sharp snap plays. Shake the device and a rumbling percussive hit lands.
Layer a synthesized voice-over on top of that — "Slide it! Shake it! Press it!" — and you have a fully immersive audio experience running on a board smaller than a credit card. The I2S amplifier ensures the audio is clean and loud enough to actually hear during play, which matters more than you might think.
Having a dedicated musician create custom sound effects and a custom backing track takes this even further. Sound that's designed specifically for the game's tempo curves and input vocabulary will feel cohesive in a way that borrowed samples never quite do.
Free Weekly Newsletter
Enjoying this guide?
Get the best articles like this one delivered to your inbox every week. No spam.
From Prototype to a Game Worth Playing: The Simon Says Layer
The original Bop It mechanic is compelling on its own — a single command fires, you execute it, and the pace ratchets up relentlessly until you fail. But layering in a Simon Says dimension makes it genuinely more interesting as a cognitive challenge.
Instead of reacting to a single command, you're now memorising and repeating sequences: toggle, shake, press — toggle, shake, press, spin — toggle, shake, press, spin, slide. Each round adds one more step to the sequence. The game becomes less about pure reaction speed and more about pattern recognition under escalating time pressure.
That design decision transforms the device from a novelty toy into something with genuine replay value. It's the kind of mechanic that's easy to understand in the first thirty seconds but takes weeks to master — and that's exactly what makes a game worth coming back to.
Conclusion
Building a 3D printed game from scratch — designing the enclosure, wiring the components, writing the firmware, composing the sound — is one of those projects that teaches you something at every stage. The Hall effect spin sensor teaches you to think creatively about inputs. The ground daisy-chaining teaches you to plan before you solder. The multi-color print teaches you what modern FDM machines are genuinely capable of.
But beyond the technical lessons, there's something more personal here. You end up with an object that didn't exist before you made it — one that fits your hand, responds to your touch, and sounds exactly the way you decided it should sound. That's not a small thing. That's the whole point of making.
If this project has sparked an idea of your own, start with the Feather RP2040 Prop-Maker and a simple enclosure. You'll be surprised how quickly a handful of printed parts and a few wires turns into something that genuinely surprises you.
Frequently Asked Questions
Q: What microcontroller is used in this 3D printed handheld game? The project uses the Adafruit Feather RP2040 Prop-Maker. It was chosen for its built-in I2S audio amplifier, onboard accelerometer, integrated battery charging, and generous GPIO count — all features that simplify the build significantly compared to using a bare RP2040 with separate breakout modules.
Q: Why use a Hall effect sensor instead of a rotary encoder for the spin input? A rotary encoder produces stepped, mechanical detents that feel clicky and incremental. For a smooth, free-spinning ball bearing mechanism, a Hall effect sensor with an embedded neodymium magnet produces a much more natural and satisfying interaction. The sensor simply detects when the magnet passes it, triggering the spin event, without any mechanical resistance from the input mechanism itself.
Q: Can this project be coded without advanced Circuit Python knowledge? The core mechanics — reading digital and analog inputs, playing audio files, driving NeoPixels, and reading I2C peripherals — are all well-supported by Adafruit's Circuit Python libraries. The audio mixing capability via AudioIO is slightly more advanced but well-documented. Starting with individual component examples and combining them incrementally is the most approachable path for beginners.
Q: What 3D printer do you need to replicate the multi-color enclosure? The multi-color faceplate shown in this project was printed on a Bambu printer with AMS (Automatic Material System) support, which enables automatic filament swapping mid-print. However, you can achieve a similar result on a single-material printer by pausing the print at a specific layer height and manually swapping filament colors — a technique that works on virtually any FDM printer.
Q: How is the alphanumeric LED display mounted inside the enclosure? Because there isn't enough clearance for traditional screw heads at the display's mounting location, PCB clip tabs — the same snap-fit method used in Adafruit's Cutie Pie enclosure designs — are used to secure the display. This approach holds the PCB firmly without requiring any fasteners, and the display connects to the Feather via a STEMMA QT cable over I2C.
Frequently Asked Questions
Why the Feather RP2040 Prop-Maker Is the Perfect Brain for This Build
When you're designing a 3D printed handheld game, the microcontroller you choose shapes everything — how many components you can connect, how the audio sounds, how portable the final device is. The Adafruit Feather RP2040 Prop-Maker earns its place at the heart of this project for several very practical reasons.
First, it has a built-in I2S amplifier. That means you get genuinely good audio quality without bolting on a separate audio board. For a game that relies on sound cues — think reactive button blips, a driving beat that speeds up as levels advance, and satisfying spinning ratchet sounds — audio quality isn't a luxury, it's essential.
Second, the Prop-Maker has a built-in accelerometer. In a game where "shake it" is one of the core commands, having the accelerometer baked right into the board eliminates an entire breakout module. Less wiring, less space consumed, fewer potential failure points.
Third, it handles battery charging on-board. Pair it with a beefy 2200mAh cylindrical lithium battery and you have a genuinely portable handheld that won't die halfway through a frantic game session. The whole setup connects over USB for easy code updates, which is one of those small-but-crucial quality-of-life features when you're actively iterating on firmware.
The generous GPIO pin count also means you can drive NeoPixels, read analog sliders, handle toggle switches, and communicate with I2C peripherals — all simultaneously, without resorting to a GPIO expander.
Designing a 3D Printed Enclosure That Feels Like a Real Product
One of the most underrated skills in DIY electronics is enclosure design, and this project takes it seriously. The handheld body was designed in CAD with careful attention to how it actually feels in your hands before a single part was printed.
The enclosure is a two-piece shell joined by countersunk screws — a deliberate choice over snap-fit closures. If you're building something that might get dropped (and a fast-paced reaction game absolutely will), countersunk screws give you a much more durable connection. They also give the finished device that satisfying, product-like quality you get when you pick up any well-made toy.
Inside, every component has its place. The alphanumeric LED display sits in its own sub-enclosure with PCB clip tabs — the same snap-fit mounting method used in Adafruit's Cutie Pie builds — because there simply isn't clearance for traditional screw heads at that location. The NeoPixel stick has built-in standoffs that align with its mounting holes. The battery clips into a snug compartment. Nothing rattles. Nothing shifts.
The multi-color printing capability of a modern multi-material FDM printer — like the Bambu AMS system — opens up a whole new dimension here. The faceplate comes out of the printer already sporting that punchy '80s-meets-'90s hot pink and light blue color scheme in a single print job. The NeoPixel diffuser window is printed right into the faceplate as a translucent panel. No post-processing, no separate parts, no glue. It's one of those moments where the technology genuinely earns its keep.
The Controls: Every Input Tells a Story
What makes this 3D printed game so interesting isn't just the electronics — it's the deliberate variety of physical inputs, each one demanding a different physical action from the player.
Press it — A Cherry MX clicky switch mounted to the faceplate. There's a reason mechanical keyboard enthusiasts are obsessed with these: the tactile and auditory feedback is deeply satisfying. In a reaction game, that physical confirmation matters.
Slide it — A potentiometer fader gives you a smooth analog input. Mapping it to a game command adds a tactile dimension you just can't replicate with another button.
Toggle it — A flip toggle switch. Fast, binary, decisive. Exactly the kind of input that works brilliantly under time pressure.
Shake it — Handled entirely by the Prop-Maker's onboard accelerometer. No extra hardware needed.
Spin it — This is the most inventive input of the bunch. Rather than a standard rotary encoder, a small ball bearing with an embedded neodymium magnet rolls around a circular track. A Hall effect sensor — a tiny three-pin component that detects magnetic fields — is mounted inside the enclosure. Every time the magnet passes the sensor, it registers a spin. The result is an interaction that feels smooth, tactile, and genuinely different from anything a rotary encoder would deliver.
That Hall effect sensor solution is worth pausing on. It requires just a pull-up resistor and three connections: power, ground, and signal to an analog pin. It's elegant precisely because it's so simple — and it produces an input that would be difficult or expensive to achieve any other way at this scale.
Wiring Strategy: Taming Multiple Ground Connections
Here's something every maker eventually confronts: when you have five or six components all needing a ground connection, your wiring can spiral into a messy rat's nest very quickly. Planning your ground strategy in advance isn't just tidy — it's what separates a prototype that works reliably from one that throws mysterious errors.
For this build, the approach is to daisy-chain grounds wherever possible. The Feather's screw block terminal accepts up to three wires, giving you a convenient hub. The NeoPixel stick has a spare ground pad on its back solder pads. The slide switch, potentiometer, and toggle switch can share a common ground line that feeds into one of those terminals. The servo ground pins are also available as overflow options.
This kind of deliberate planning pays dividends later. When you're debugging at midnight and one input isn't responding, knowing your ground topology means you can trace the issue in minutes instead of hours.
The STEMMA QT connectors on the alphanumeric display are a welcome relief in the middle of all this manual wiring. Plug in, done. The I2C connection just works, the Circuit Python library handles the rest, and you're back to focusing on the interesting stuff.
Circuit Python Audio: Layering Sound Like a Mini Mixing Board
Sound design is where this project really elevates itself above a typical maker build. Using Circuit Python's AudioIO mixer functionality, you can run multiple audio tracks simultaneously at individually controlled volume levels. Think of it as a tiny software mixing board running on your microcontroller.
In practice, that means the game can have a driving rhythmic beat playing on a continuous loop — one that gradually increases in tempo as the player advances through levels — while simultaneously triggering discrete sound effects for each input. Spin the ball bearing and a ratcheting click fires. Hit the toggle switch and a sharp snap plays. Shake the device and a rumbling percussive hit lands.
Layer a synthesized voice-over on top of that — "Slide it! Shake it! Press it!" — and you have a fully immersive audio experience running on a board smaller than a credit card. The I2S amplifier ensures the audio is clean and loud enough to actually hear during play, which matters more than you might think.
Having a dedicated musician create custom sound effects and a custom backing track takes this even further. Sound that's designed specifically for the game's tempo curves and input vocabulary will feel cohesive in a way that borrowed samples never quite do.
From Prototype to a Game Worth Playing: The Simon Says Layer
The original Bop It mechanic is compelling on its own — a single command fires, you execute it, and the pace ratchets up relentlessly until you fail. But layering in a Simon Says dimension makes it genuinely more interesting as a cognitive challenge.
Instead of reacting to a single command, you're now memorising and repeating sequences: toggle, shake, press — toggle, shake, press, spin — toggle, shake, press, spin, slide. Each round adds one more step to the sequence. The game becomes less about pure reaction speed and more about pattern recognition under escalating time pressure.
That design decision transforms the device from a novelty toy into something with genuine replay value. It's the kind of mechanic that's easy to understand in the first thirty seconds but takes weeks to master — and that's exactly what makes a game worth coming back to.
Conclusion
Building a 3D printed game from scratch — designing the enclosure, wiring the components, writing the firmware, composing the sound — is one of those projects that teaches you something at every stage. The Hall effect spin sensor teaches you to think creatively about inputs. The ground daisy-chaining teaches you to plan before you solder. The multi-color print teaches you what modern FDM machines are genuinely capable of.
But beyond the technical lessons, there's something more personal here. You end up with an object that didn't exist before you made it — one that fits your hand, responds to your touch, and sounds exactly the way you decided it should sound. That's not a small thing. That's the whole point of making.
If this project has sparked an idea of your own, start with the Feather RP2040 Prop-Maker and a simple enclosure. You'll be surprised how quickly a handful of printed parts and a few wires turns into something that genuinely surprises you.
Frequently Asked Questions
Q: What microcontroller is used in this 3D printed handheld game? The project uses the Adafruit Feather RP2040 Prop-Maker. It was chosen for its built-in I2S audio amplifier, onboard accelerometer, integrated battery charging, and generous GPIO count — all features that simplify the build significantly compared to using a bare RP2040 with separate breakout modules.
Q: Why use a Hall effect sensor instead of a rotary encoder for the spin input? A rotary encoder produces stepped, mechanical detents that feel clicky and incremental. For a smooth, free-spinning ball bearing mechanism, a Hall effect sensor with an embedded neodymium magnet produces a much more natural and satisfying interaction. The sensor simply detects when the magnet passes it, triggering the spin event, without any mechanical resistance from the input mechanism itself.
Q: Can this project be coded without advanced Circuit Python knowledge? The core mechanics — reading digital and analog inputs, playing audio files, driving NeoPixels, and reading I2C peripherals — are all well-supported by Adafruit's Circuit Python libraries. The audio mixing capability via AudioIO is slightly more advanced but well-documented. Starting with individual component examples and combining them incrementally is the most approachable path for beginners.
Q: What 3D printer do you need to replicate the multi-color enclosure? The multi-color faceplate shown in this project was printed on a Bambu printer with AMS (Automatic Material System) support, which enables automatic filament swapping mid-print. However, you can achieve a similar result on a single-material printer by pausing the print at a specific layer height and manually swapping filament colors — a technique that works on virtually any FDM printer.
Q: How is the alphanumeric LED display mounted inside the enclosure? Because there isn't enough clearance for traditional screw heads at the display's mounting location, PCB clip tabs — the same snap-fit method used in Adafruit's Cutie Pie enclosure designs — are used to secure the display. This approach holds the PCB firmly without requiring any fasteners, and the display connects to the Feather via a STEMMA QT cable over I2C.
About Zeebrain Editorial
Zeebrain publishes independent analysis of markets, investing, personal finance, and business. We disclose affiliate relationships, never accept payment for coverage, and fact-check all claims against primary sources. Read our editorial policy →
More from Science & Tech


Related Guides
Keep exploring this topic
Breadboard.ing: Fritzing for the Web Is Finally Here
Science & Tech · CircuitPython · Adafruit
ChatGPT Tips and Tricks: Mastering the Art of Conversational AI
Science & Tech
OpenRouter Fusion: Multi-Model AI That Rivals Top Models
Science & Tech
Dual Brain AI Robots: Next-Gen Architecture in 2025
Science & Tech
Explore More Categories
Keep browsing by topic and build depth around the subjects you care about most.